Soft and Fluffy Japanese Shokupan Bread Recipe
Introduction
Shokupan, or Japanese milk bread, is known for its soft, fluffy texture and slightly sweet taste. This recipe uses a yudane method, which creates a tender crumb that melts in your mouth. It’s perfect for sandwiches or enjoying on its own with butter.
Ingredients
- 50 g bread flour (*1)
- 40 ml boiling water (above 194°F/90°C)
- 150 ml milk (room temperature) (*3)
- 15 g sugar
- 3 g dry instant yeast (*2)
- 10 g unsalted butter (room temperature)
- 200 g bread flour (*1)
- 5 g salt
Instructions
- Step 1: Make the yudane the night before. Place 50 g bread flour in a bowl, add 40 ml boiling water, and mix well. Cover with cling wrap and refrigerate overnight.
- Step 2: Pour room temperature milk into a stand mixer bowl.
- Step 3: Add sugar, butter, and yeast to the bowl. Tear the yudane into small pieces and add them in.
- Step 4: Add 200 g bread flour and salt to the bowl.
- Step 5: Attach the kneading hook to the mixer. Combine all ingredients on low speed (1).
- Step 6: Once combined, increase speed to 5 or 6 and knead the dough for 20 minutes.
- Step 7: Shape the dough into a round ball and place it into a greased bowl. Cover with cling wrap and let it rise at about 86°F (30°C) for 45 minutes to 1 hour, or until doubled in size.
- Step 8: Dust your finger with flour and gently poke the dough to test if it has risen. If the hole remains, the dough is ready.
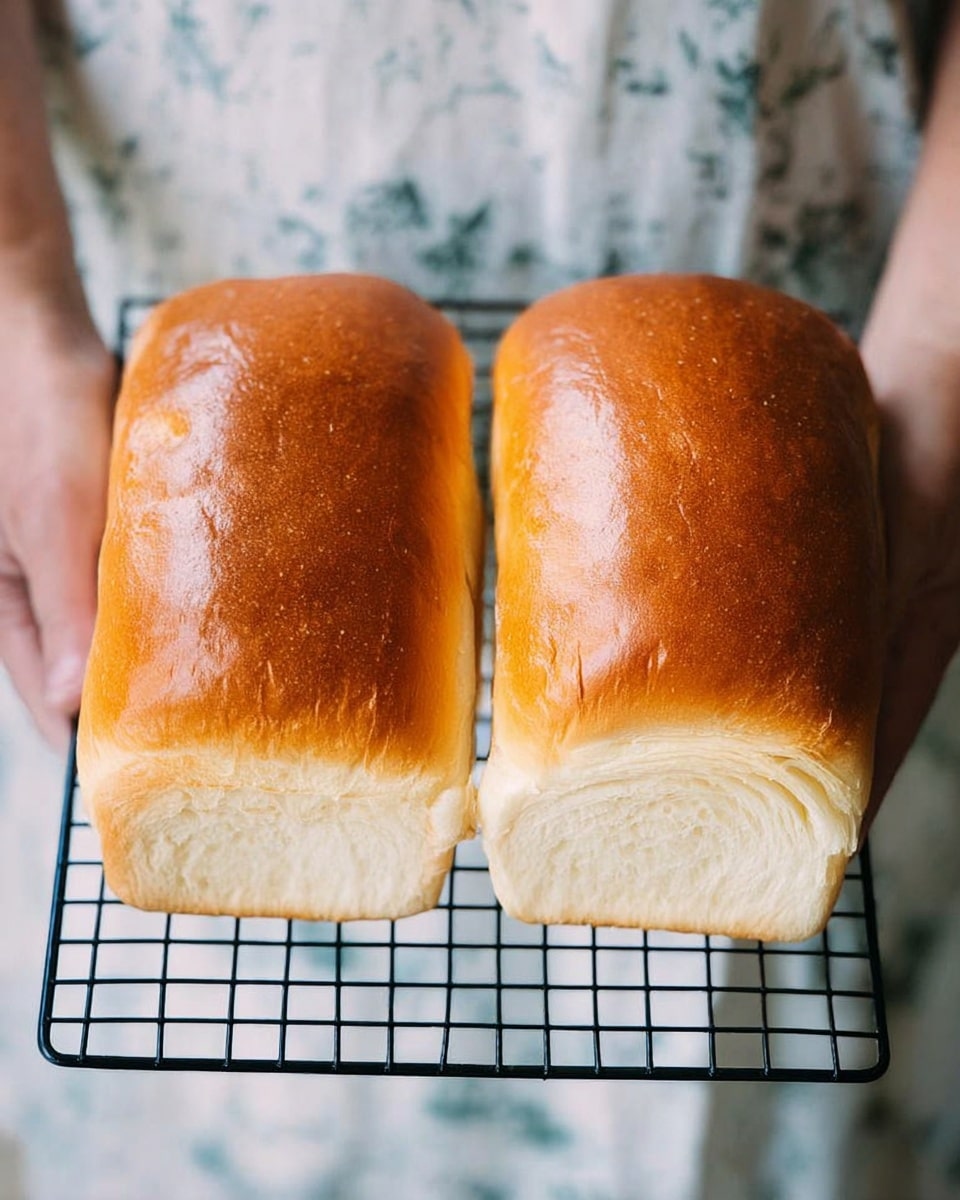
- Step 9: Punch down the dough, divide into two equal parts, and roll each piece into a ball.
- Step 10: Cover the dough balls with a wet cloth and let them rest for 20 minutes (bench time).
- Step 11: Roll each dough ball into a 5.9 x 7.8 inch (15 x 20 cm) rectangle.
- Step 12: Fold each rectangle tightly from left and right towards the center, avoiding trapping air.
- Step 13: Rotate the dough 90 degrees and roll it up from one end.
- Step 14: Lightly spray a loaf tin and place the rolled dough inside, seam side toward the center.
- Step 15: Cover with a wet cloth and let the dough rise a second time for about 30 minutes, until it reaches the top of the tin.
- Step 16: Preheat the oven to 365°F (185°C).
- Step 17: When the dough has risen to the top of the tin, it’s ready to bake.
- Step 18: Bake for 25 to 30 minutes in the preheated oven.
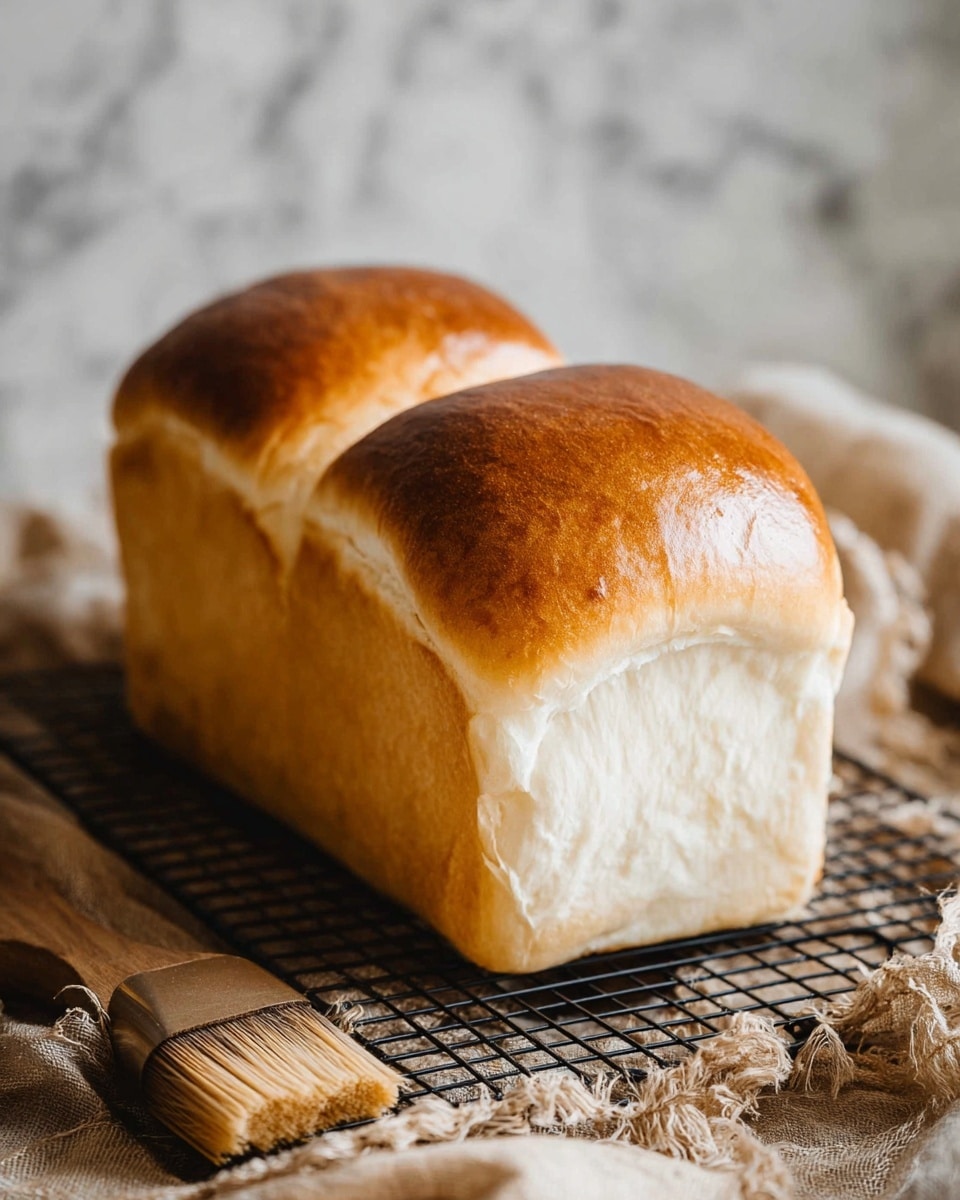
- Step 19: Remove the bread from the tin and cool on a wire rack.
- Step 20: Optionally, whisk an egg and brush it lightly over the cooled bread for a shiny crust.
Tips & Variations
- Use room temperature ingredients to help the yeast activate evenly.
- Skipping the egg wash will result in a softer, matte crust instead of a shiny one.
- For added flavor, try incorporating a tablespoon of powdered milk into the dough.
- If you don’t have a stand mixer, knead the dough by hand for about 30 minutes until smooth and elastic.
Storage
Store Shokupan bread wrapped in plastic wrap or in an airtight container at room temperature for up to 3 days. For longer storage, freeze the loaf sliced and sealed in freezer bags for up to 1 month. To reheat, toast slices or warm in a preheated oven at 300°F (150°C) for 5–10 minutes.
How to Serve
Serve this delicious recipe with your favorite sides.
FAQs
What is the yudane method and why is it used?
Yudane is a technique where hot water is mixed with flour to gelatinize the starches before making the dough. This helps create a soft, fluffy texture and extends the bread’s freshness.
Can I make this bread without a stand mixer?
Yes, you can knead the dough by hand. It will take longer—around 30 minutes—to achieve the same smooth and elastic texture that a mixer provides.
PrintSoft and Fluffy Japanese Shokupan Bread Recipe

Shokupan, a classic Japanese milk bread, is renowned for its soft, fluffy texture and slightly sweet flavor. Using the Yudane method, which involves mixing boiling water with some of the flour to create a gelatinized roux, this bread achieves its characteristic moist crumb and tender bite. Perfect for sandwiches or simply enjoyed with butter, it offers a delicate, pillowy loaf that is both visually appealing and delicious.
- Prep Time: 15 minutes (plus overnight for Yudane)
- Cook Time: 25-30 minutes
- Total Time: 12 hours (including overnight Yudane and proofing times)
- Yield: One loaf (about 8 slices)
- Category: Bread
- Method: Baking
- Cuisine: Japanese
- Diet: Vegetarian
Ingredients
Yudane Mixture
- 50 g Bread flour
- 40 ml Boiling water (above 194°F / 90°C)
Main Dough
- 150 ml Milk (room temperature)
- 15 g Sugar
- 3 g Dry instant yeast
- 10 g Unsalted butter (room temperature)
- 200 g Bread flour
- 5 g Salt
Instructions
- Prepare Yudane the night before: Place 50 g bread flour in a bowl. Pour 40 ml boiling water over the flour and mix thoroughly to form a thick paste. Cover with cling wrap and refrigerate overnight to hydrate the flour fully.
- Combine liquid ingredients: Pour 150 ml room temperature milk into the stand mixer bowl. Add 15 g sugar, 10 g unsalted butter, and 3 g dry instant yeast to the bowl.
- Add Yudane: Tear the prepared Yudane into small pieces and add it to the mixer bowl.
- Add dry ingredients: Add 200 g bread flour and 5 g salt into the bowl.
- Mix initial dough: Attach the kneading hook and mix all ingredients on low speed (speed 1) until they are combined thoroughly.
- Knead the dough: Increase the mixer speed to 5 or 6 and knead the dough for 20 minutes until smooth and elastic.
- First proof: Shape the dough into a round ball and place it in a greased bowl. Cover with cling wrap and let it rise at around 86°F (30°C) for 45 minutes to 1 hour, or until it doubles in size.
- Check proofing: Dust your finger with flour and poke the dough. If the indentation remains and doesn’t bounce back, the dough is ready for the next stage.
- Divide and shape: Punch down the dough gently. Cut the dough into two equal parts using a scraper and roll each into a ball.
- Bench rest: Cover the rolled dough with a wet cloth and let them rest for 20 minutes.
- Roll out dough: Using a rolling pin, flatten each dough piece into a rectangle approximately 5.9 x 7.8 inches (15 x 20 cm).
- Fold dough: Fold the dough tightly from left and right sides toward the center, ensuring no air is trapped inside.
- Roll dough: Rotate the folded dough 90 degrees and roll it tightly from one end to form a loaf shape.
- Prepare loaf tins: Lightly spray one loaf bread tin with cooking spray or grease it.
- Second proof: Place the rolled dough seam side down at the end of the tin. Cover with a wet cloth and let it rise for about 30 minutes until it reaches the top of the bread tin.
- Preheat oven: Begin preheating the oven to 365°F (185°C) while the dough rises.
- Check readiness: When the dough has risen to be level with the tin, it is ready to bake.
- Bake: Bake the bread in the preheated oven for 25 to 30 minutes until the crust is golden brown and internal temperature reaches around 190°F (88°C).
- Cool: Remove the bread from the loaf tin and allow it to cool on a wire rack.
- Optional glaze: Whisk an egg and lightly brush it over the bread before baking for a shiny crust (optional step, ideally done before baking).
Notes
- The Yudane method, involving pre-cooked flour with boiling water, helps create the bread’s tender and fluffy texture.
- Maintaining the correct dough temperature (around 86°F/30°C) during rising is essential for proper fermentation.
- Check dough readiness by the finger poke test to avoid under or over-proofing.
- The optional egg wash should be applied before baking to achieve a glossy finish.
- Using bread flour is critical due to its higher protein content which provides strength and elasticity to the dough.
- This bread is best enjoyed fresh but can be stored wrapped at room temperature for 2-3 days or frozen for longer storage.
Keywords: Shokupan, Japanese milk bread, Yudane method, soft bread, fluffy bread, homemade bread, milk bread loaf